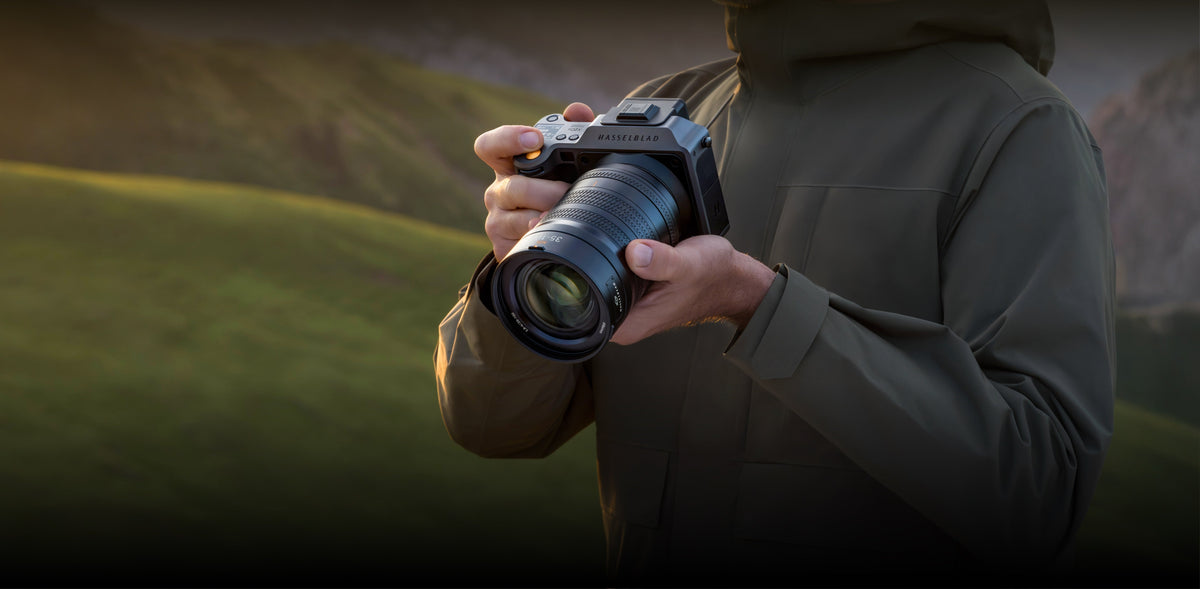
Travel photography is the practice of interpreting a place through its landscapes, people, architecture, details, and daily rhythms. Strong travel photos often begin before the camera is raised: with a clear idea, informed planning, and enough freedom to respond to what unfolds. This travel photography guide follows that complete process, from researching a destination and selecting gear to composing individual frames and editing them into a coherent story. The aim is not to return with a record of every stop. It is to create a concise body of photographs that conveys what the place looked like, how it felt, and what made the journey distinct.
How to Plan a Travel Photography Trip
Plan around the story you want to tell, the conditions that shape it, and the time required to observe. A useful travel photography plan identifies a visual direction, confirms practical access, and leaves room for discovery. It should guide attention without turning the trip into a fixed checklist.
Define the Story Before Planning the Itinerary
Begin with a simple question: what is this journey really about? A destination is a location; a story is a point of view. One photographer may approach a coastal town through its working harbor, another through the line between land and sea, and another through the people whose routines follow the tide. Each idea leads to different places, times, and pictures.
Write a one-sentence story premise before building the itinerary. Keep it specific enough to direct decisions and open enough to accommodate surprise. For example: “A day shaped by the river, from the first delivery boats to the evening lights along the bank.” This premise suggests subjects, a sequence, and a natural beginning and end.
Then identify three to five supporting visual themes, such as the wider environment, human activity, material details, traces of history, or changes in light. When time is limited, these themes help distinguish an image that advances the story from one that repeats a familiar view.
Research Light, Access, and Local Conditions
Good destination research is visual and practical. Note the direction of morning and evening light, the relationship between locations, seasonal weather, opening hours, transit time, and whether a site requires a reservation, permit, or guide. Confirm current rules with the location or local authority shortly before the visit, since access can change.
Look beyond landmark photographs. Maps reveal shorelines, elevation, street orientation, and possible viewpoints. Local reporting and cultural calendars can indicate market days, public events, or closures. Historical and cultural research helps a photographer understand what is significant rather than treating the destination as a collection of surfaces.
Build time into the plan for arrival and observation. Reaching a location 30 to 45 minutes before the expected light gives you space to study movement, choose a background, and notice how people use the setting. For street and documentary scenes, repeated visits often reveal more than a single long stop. Familiarity makes patterns visible.
Create a Flexible Travel Photography Shot List
A useful shot list describes visual roles, not only named attractions. It protects the completeness of the story while leaving the actual photographs open to experience.
Include:
-
An establishing image that locates the viewer
-
An environmental frame that shows how people, structures, or weather relate to the place
-
A medium view that clarifies an activity or relationship
-
A portrait or human gesture that gives the story presence
-
Details that reveal texture, craft, food, signage, or evidence of daily use
-
A transition that connects one location, time, or mood to another
-
A closing image that gives the sequence a sense of resolution
Review the list midway through the day and ask what the story still lacks. If you already have several wide views, the next useful image may be a quiet detail or interaction. This produces variety with purpose.

@Albrecht Voss
How to Choose Travel Photography Gear
Choose travel photography gear by subject, pace, working distance, and final use. A practical kit covers the needs you expect to encounter while remaining comfortable to carry and familiar to operate. It should support your attention to the place rather than repeatedly interrupt it.
Match Your Gear to the Subject and Trip
Start with the scenes central to the story. Architecture and landscapes may call for controlled framing and fine detail. Markets or moving street scenes place greater emphasis on responsive autofocus and handheld stability. Environmental portraits require a comfortable working distance and enough context to describe the surroundings.
Consider the physical character of the trip as carefully as the image brief. A day based in one neighborhood allows a different kit from a multiday route with long walks, small aircraft, or frequent weather changes. Pack for the conditions you will repeatedly encounter, then add only what resolves a clear creative or operational need.
Carry spare batteries and sufficient storage, cleaning tools, and weather protection appropriate to the forecast. Add a tripod when long exposures, precise alignment, or extended low-light work are part of the plan.
Choose Focal Lengths for Different Travel Scenes
Focal length changes more than how much fits inside the frame. It changes distance, perspective, and the photographer’s relationship to the scene.
A wide field of view can place architecture, landscape, or a person within a larger environment. A moderate focal length preserves context without making it dominant in street scenes, interiors, and environmental portraits. A longer focal length can isolate a gesture, compress layers, or work across a distance when stepping closer would disturb the moment.
Choose focal lengths by image role. An establishing photograph usually benefits from context; a detail or portrait may benefit from separation. Changing focal length should clarify the story, not simply make the subject larger or smaller.
Choose Between a Prime and a Zoom
A prime lens offers a consistent way of seeing, and the need to move can encourage deliberate framing. A zoom provides more flexibility when access is restricted, subjects are moving, or the story shifts between wider context and closer observation.
For a slow, focused project, one prime may be sufficient. For a route that combines landscapes, streets, portraits, and details, a carefully chosen zoom can reduce lens changes and help maintain the flow of shooting. Select the option whose characteristics support the pace and visual language of the assignment.
For trips that combine these different subjects, the Hasselblad XCD 2,8-4/35-100E covers approximately 28–76mm in full-frame-equivalent terms. Its range allows a photographer to move from an establishing view to a more selective composition without changing lenses. The maximum aperture transitions from f/2.8 at the wide end to f/4 at the telephoto end.
[cta: https://store-na.hasselblad.com/products/xcd-2-8-4-35-100e]
Match the Camera System to the Way You Travel
Choose a camera system according to the pace of the trip, the subjects you expect to photograph, and how deliberately you prefer to compose. Fast-changing streets and moving subjects may benefit from responsive autofocus and handheld stabilization. Architecture, landscapes, and observational projects may place greater emphasis on viewing position, fine detail, and considered framing.
For photographers moving between spontaneous moments and carefully composed scenes, the Hasselblad X2D II 100C supports a responsive handheld approach. With the mechanical shutter and a compatible XCD lens running updated firmware, AF-C subject detection can track people, vehicles, cats, and dogs. The 5-axis in-body image stabilization helps reduce the effect of camera movement when working without a tripod.
[cta: https://store-na.hasselblad.com/products/x2d-ii-100c]
For journeys centered on architecture, landscapes, environmental portraits, or deliberate observation, the Hasselblad 907X & CFV 100C offers a different way to compose. Its display tilts upward to 40 or 90 degrees, with the 90-degree position supporting classic waist-level viewing. This viewing position can help photographers explore lower perspectives and organize foreground relationships without composing from the usual eye-level position.
[cta: https://store-na.hasselblad.com/products/907x-cfv-100c]
Travel Photography Settings for Common Scenes
There is no single set of travel photography settings for every destination. Exposure depends on light, subject movement, focal length, stabilization, and the intended rendering. Use the values below as starting points, check the histogram and highlights, and adjust for the scene in front of you.
|
Scene |
Exposure Mode |
Aperture |
Shutter Speed |
ISO |
Practical Starting Point |
|---|---|---|---|---|---|
|
Daylight landscape |
Aperture priority or manual |
f/8 to f/11 |
As required; consider a tripod as shutter speed decreases |
Base ISO |
Place focus according to the required near-to-far depth, then confirm detail at high magnification. |
|
Moving street subject |
Shutter priority or manual |
f/4 to f/8 |
1/500 second or faster |
Auto ISO with a chosen limit |
Use continuous autofocus when available and keep enough depth of field for small changes in subject distance. |
|
Environmental portrait |
Aperture priority or manual |
f/2.8 to f/5.6 |
1/250 second or faster |
Lowest ISO that maintains the shutter speed |
Focus on the nearest eye, then check whether the surroundings remain descriptive rather than distracting. |
|
Low-light interior |
Manual or aperture priority |
Widest useful aperture |
Begin near 1/125 second for a still subject |
Raise as needed |
Stabilization can reduce camera movement, but it does not stop subject movement. Watch mixed light and bright windows. |
|
Blue hour cityscape |
Manual |
f/5.6 to f/11 |
Based on the desired movement |
Base or low ISO on a tripod |
Expose for important highlights and use a stable support when you want clean detail throughout the frame. |
|
Handheld detail |
Aperture priority |
f/4 to f/8 |
Start near 1/(equivalent focal length), then adjust |
Auto ISO |
Place the focus point precisely and increase shutter speed when wind, hands, fabric, or foliage is moving. |
Protect important highlights in strong contrast, especially around reflective water, pale architecture, or windows. Review the histogram as evidence, not as a demand to distribute tones evenly. A low-key interior and a bright coastal scene should not produce identical graphs.
How to Compose Better Travel Photos
Strong travel photography composition gives the viewer a clear point of entry, enough context to understand the place, and deliberate relationships among the elements in the frame. Composition is less about applying a rule than deciding what the photograph is about and removing visual competition.
Create a Clear Visual Subject
Before taking the photograph, finish this sentence: “This image is about…” If the answer names several unrelated elements, the frame may need simplification. Change position, wait for a cleaner moment, adjust focal length, or allow light and color to separate the subject from its surroundings.
Clarity does not require centering or isolating the subject. It means the viewer can recognize the photograph’s visual priority. A small figure can remain the subject when scale, contrast, gesture, or leading structure directs attention toward it.
Scan the entire frame before releasing the shutter. Pay particular attention to corners, bright signs, partial objects, and lines that appear to grow from a person or building. Moving a few inches can resolve an overlap that may be difficult to repair convincingly in postproduction.
Add Context, Depth, and Scale
Context turns a photograph of a subject into a photograph of a place. Include surroundings that explain where the subject is, what is happening, or why the moment matters. An artisan’s hands may gain meaning from a trace of the workshop; a lone hiker may communicate distance through the landscape around the figure.
Depth can be built through foreground, middle ground, and background relationships. Doorways, foliage, reflections, shadows, or architectural edges can establish a foreground without becoming decorative clutter. Overlapping forms and changes in scale help the eye move through the frame.
Use scale with intention. A person, vehicle, doorway, or familiar object can reveal the size of a landscape or structure. The reference should feel part of the scene, not inserted only to demonstrate magnitude.
Refine Perspective, Light, and Color
A lower position may strengthen the foreground, a higher position may clarify patterns, and a step to either side may separate overlapping forms. Perspective is set by camera position; focal length determines how much of that view is included.
Read light by its direction and character. Side light describes texture and volume. Backlight can simplify a crowded setting into gesture and shape. Open shade offers restrained contrast for portraits and details. Midday light can reveal color, geometry, and hard-edged shadows when treated as part of the design rather than as a condition to avoid.
Color can organize the frame as decisively as line. Look for a dominant palette, a controlled contrast between warm and cool regions, or a small repeated color that connects separate subjects. If every strong color is allowed equal weight, the image may lose its center. Restraint often gives color greater presence.

@Zhenglin Li
How to Tell a Story With Travel Photos
A travel photo story combines images with different roles, scales, and emotional tones so the viewer can move through a place rather than encounter a series of unrelated highlights. Storytelling can begin while shooting and take its final shape through selection, sequence, and accurate context.
Capture Establishing, Medium, and Detail Shots
Think in visual distances. An establishing image introduces the environment and gives the story a geographic or atmospheric beginning. A medium view shows an activity, relationship, or recognizable part of the setting. A detail draws attention to material, gesture, or evidence that might disappear in a wider frame.
These are story functions, not rigid focal-length categories. What matters is how much information the image gives and where it sits in the sequence.
Avoid producing several photographs that perform the same role. Five variations of a landmark may demonstrate persistence, but they do not necessarily deepen the account. Once a strong establishing frame exists, look for what it cannot show.
Include People, Action, and Transitions
People give travel stories time, scale, and human consequence. A portrait offers presence; a moving figure can reveal how a place is used; a gesture can carry more information than a posed smile. Approach people with respect, communicate clearly when making a portrait, and follow local rules and customs.
Action does not need to be dramatic. Steam rising from a morning kitchen, a shopkeeper arranging a window, or commuters gathering at a crossing can describe the rhythm of a destination. Anticipate where an action will resolve, choose the background first, and wait for the gesture to enter the composition.
Transitions prevent the story from feeling like a collection of peaks. Roads, windows, weather, meals, shadows, and moments between destinations can connect changes in place or time. They create breathing room and allow the quieter character of the journey to remain visible.
Sequence and Edit a Travel Photo Story
Begin the edit by removing technical failures and near-duplicates, but do not select only the visually forceful images. A successful sequence needs contrast in scale, pace, light, and information. A subtle frame may be essential because it prepares the viewer for the photograph that follows.
Group images by story function, then build a provisional sequence. Open with an image that establishes place or raises a question. Develop the middle through changes in distance and subject, placing related colors, gestures, or shapes near one another without making the connection too literal. Close with an image that resolves the journey, changes its emotional temperature, or leaves a deliberate sense of continuation.
Test the sequence at thumbnail size to reveal repeated compositions and abrupt tonal shifts. Then review full-resolution files for focus, gesture, edge detail, and color. Edit each image in relation to the set so an isolated treatment does not interrupt the visual voice.
A concise story is usually stronger than an exhaustive one. The final number depends on the format, but each image should either add new information, deepen the mood, or create a necessary transition. If two photographs make the same contribution, keep the more precise one.
Add Context With Accurate Captions
Captions should answer what the image cannot: who or what is shown, where it was made, when relevant, and why the moment matters. Verify names, spellings, locations, and cultural references. Do not infer a person’s identity, occupation, or beliefs from appearance.
Keep the writing specific and restrained. “Morning preparations at a family-run bakery in…” gives the viewer more than “local life,” while leaving the photograph room to speak. When a fact is uncertain, confirm it before publication or omit it. Accuracy is part of the visual story’s integrity.

@Zhenglin Li
Travel Photography Checklist
Before the trip
-
Write a one-sentence story premise and three to five supporting themes.
-
Research light direction, weather, access, opening hours, transportation, and current location rules.
-
Build a shot list by story role, including establishing, medium, portrait, detail, transition, and closing images.
-
Choose the smallest camera and lens system that resolves the repeated needs of the trip.
-
Prepare batteries, storage, cleaning tools, weather protection, identification, and any required permits or releases.
-
Set the camera clock and confirm a consistent file-naming and backup plan.
During the trip
-
Arrive early enough to observe before photographing.
-
Check the frame edges, background, shutter speed, focus, and highlights.
-
Vary visual distance and image role rather than collecting near-duplicates.
-
Record names, spellings, locations, and caption notes while details are fresh.
-
Back up files to a second location when practical and keep the copies physically separate.
-
Leave unscheduled time for weather, conversation, and discoveries that research could not predict.
After the trip
-
Create and verify a complete backup before formatting cards or deleting files.
-
Remove technical failures and duplicates, then group images by story function.
-
Build a sequence with variation in scale, pace, subject, and light.
-
Edit for visual consistency while preserving the character of each scene.
-
Fact-check captions and location information before publication.
-
Export for the intended medium and review the finished story as a whole.
Frequently Asked Questions About Travel Photography
How Many Photos Should Be Included in a Travel Photo Story?
There is no fixed number, but a focused online travel photo story often works with 10 to 20 images. Keep only photographs that add information, deepen atmosphere, or create a necessary transition. Remove repetitions even when each image is individually strong.
How Can You Balance Photography With Enjoying the Trip?
Choose a few dedicated photography periods and let the rest of the day remain open. A clear story premise reduces constant shooting because you know what matters. Observe first, make the photograph, then lower the camera and stay present.
How Do You Protect Camera Gear While Traveling?
Use a discreet, well-fitting bag; keep equipment within reach in transit; carry weather protection; and separate backup storage from the main kit. Record serial numbers before departure, and check current airline and insurance requirements for your route.
How Can You Take Travel Photos Without Slowing Down a Group?
Set expectations before the day begins, identify one or two priority locations, and prepare exposure and focus settings while walking. Work with a limited kit, photograph in short intervals, and schedule independent time for scenes that require patience.